


Top or Dress with Bateau Neck and Shoulder Ties
This article will teach you how to create a dress or top with a bateau (boat) neckline and ties at the shoulder.
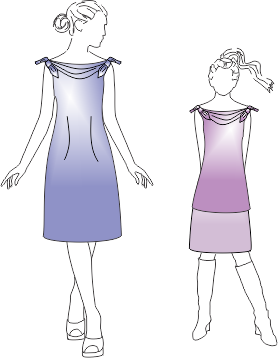
Dress with Shoulder Ties
Draft the Patterns
- In the PatternMaster of your choice, draft a blouse, dress, top, or sheath with a jewel neckline.
- This style can be drafted with no darts, side, side/waist, armscye, waist or French darts, armscye princess seams, or blouson style. Do not choose shoulder, center, or neckline darts, shoulder princess, princess panel, neckline princess
- Choose No Darts for the back darts.
- Do not choose a sleeve or collar.
- Choose No Closure for the front closure. Choose Back Zipper for the back closure if drafting a style that cannot go over your head.
- Set the seam allowances to 0.
- Set the desired garment length.
- Save the patterns and then choose Open Patterns in Pattern Editor.
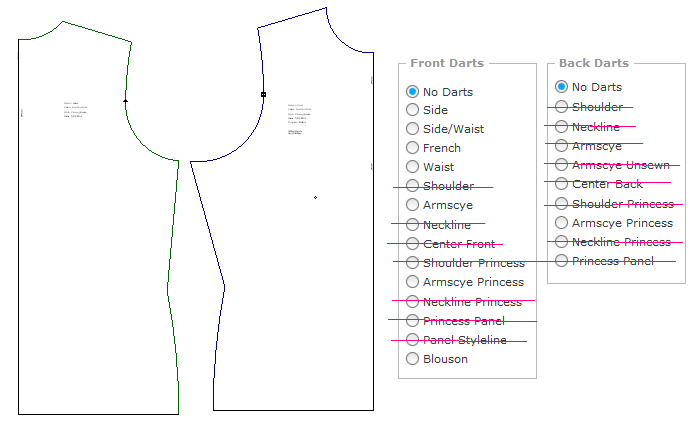
Figure 1
Create the Shoulder Ties
- In Pattern Editor, open the saved patterns and ungroup the patterns if they are not already ungrouped.
- Select the front pattern and drag it to the left of the back pattern.
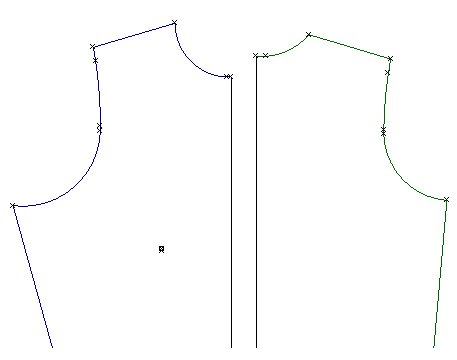
Figure 2. Move the front
- Choose Line (LI) and SNAP to the shoulder/neck point intersection.
- Drag the mouse up. Hold the CTRL key down to draw an exactly vertical line.
- Type .75 on the keyboard and press Enter.
- Repeat to draw a vertical line on the back at the shoulder/neck intersection.
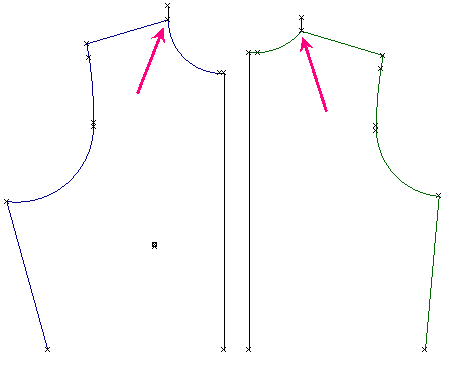
Figure 3. Draw lines at shoulder/neck points
- Save the file (Ctrl S).
- Choose Line (LI) and SNAP to the mid point of the front armhole.
- Drag the mouse to the RIGHT past the center front line and CLICK to place the second point of the line.
- Choose Line (LI) and SNAP to the mid point of the back armhole.
- Drag the mouse to the LEFT past the center back line and CLICK to place the second point of the line.
- Make sure to draw both lines exactly horizontal.
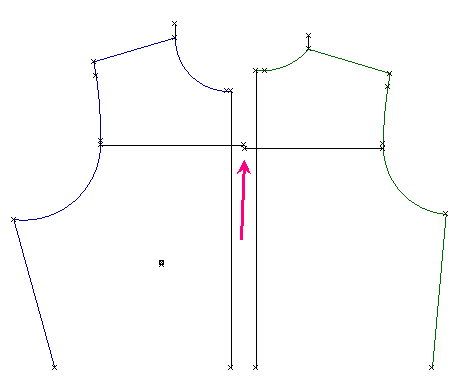
Figure 4. Draw lines from mid armhole to centers
- Choose Intersect (IN) and intersect each line to meet the center front and center back.
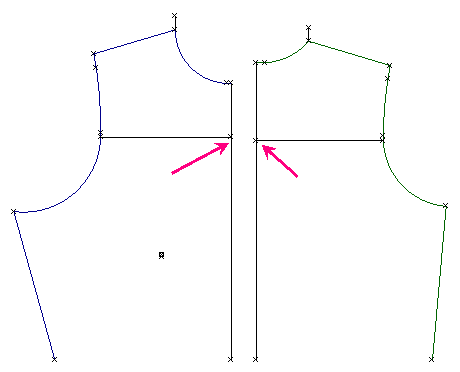
Figure 5. Intersect horizontal lines with centers
- Choose Line (LI) and SNAP to the mid point of the front armhole.
- Drag the mouse UP above the shoulder/armhole point and CLICK to place the second point of the line.
- Repeat to draw a line on the back.
- Hold the CTRL key down to draw exactly vertical lines.
- Save the file (Ctrl S).
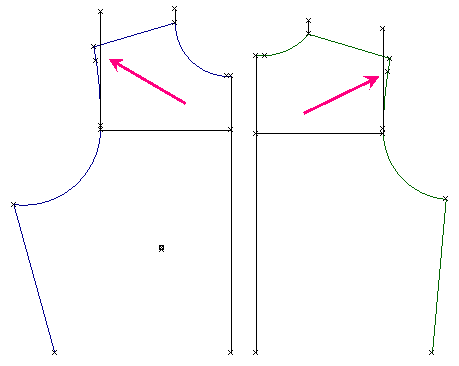
Figure 6. Draw vertical lines at the front and back armholes
- Choose LINE (LI) and SNAP to the top of the vertical line at the shoulder/neck point on the front.
- Repeat to draw a line on the back.
- Hold the CTRL key down to draw exactly horizontal lines.
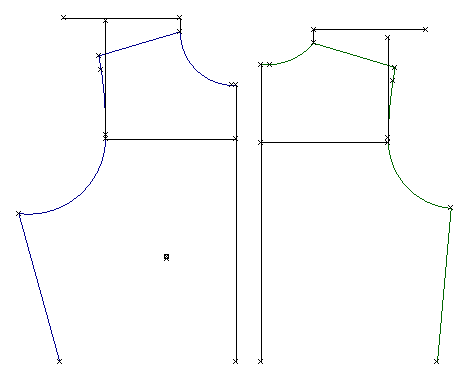
Figure 7. Draw lines from the shoulder/neck points
- Choose Intersect (IN) and intersect the horizontal and vertical lines as shown in Figure 8.
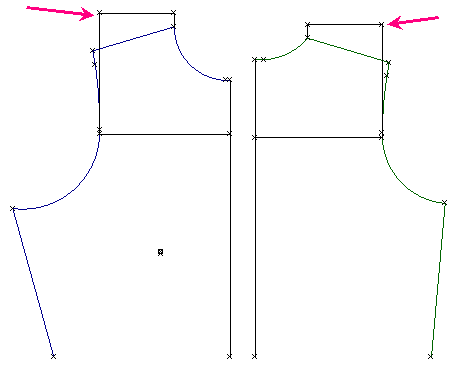
Figure 8. Intersect lines
- Choose Intersect (IN) and extend the center front and center back lines to the top horizontal lines just drawn.
- Choose Intersect (IN) and extend the top horizontal lines to meet the center front and center back lines.
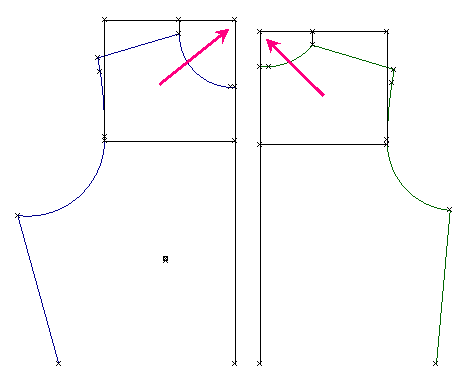
Figure 9. Intersect the center lines with the top horizontal lines
- Save the file (Ctrl S).
- Select the vertical line drawn up from the mid armhole as shown in Figure 10 and choose Locate Mid (LM).
- Repeat to place a mid point on the back vertical line.
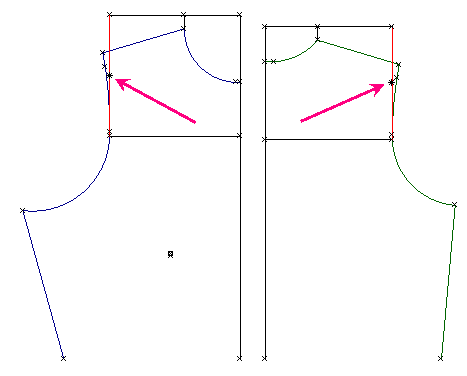
Figure 10. Locate mid points
- Choose Line (LI) and SNAP to the mid point just placed on the front vertical line.
- Drag the mouse to the LEFT holding the CTLR key down.
- Type 10 (25 cm) (or desired length) on the keyboard and press Enter.
- Repeat to draw a line to RIGHT on the back bodice.
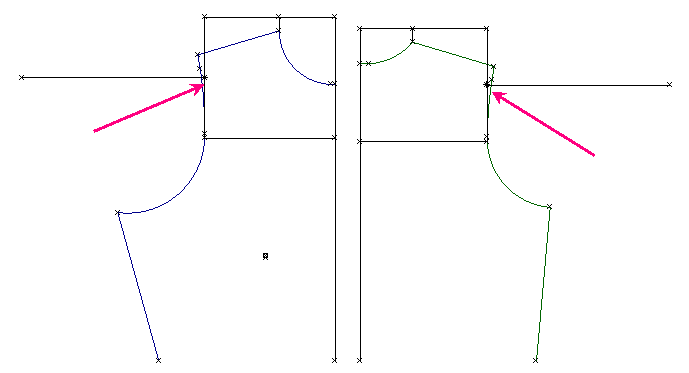
Figure 11. Draw lines out from mid armhole
- Choose Arc (AR) and SNAP to the end point of the norizontal line just drawn.
- SNAP to the point on the armhole.
- Drag the mouse to the LEFT, type .25 on the keyboard, and press Enter.
- Repeat this process to draw the remaining three arcs. SNAP in the order as shown in Figure 12.
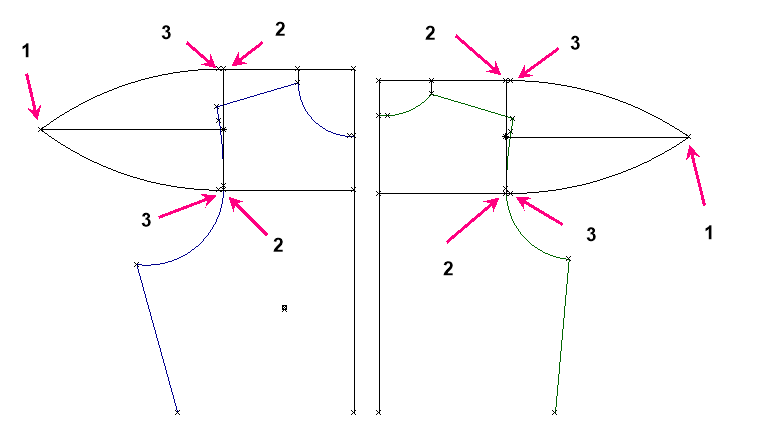
Figure 12. Draw arcs for tie ends
- Select and delete the objects as shown in Figure 13.
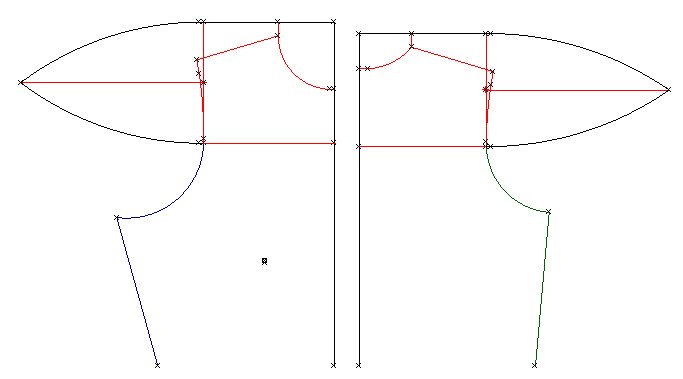
Figure 13. Select and delete objects
- Use the Offset (OF) and Intersect (IN) commands to add the seam allowances.
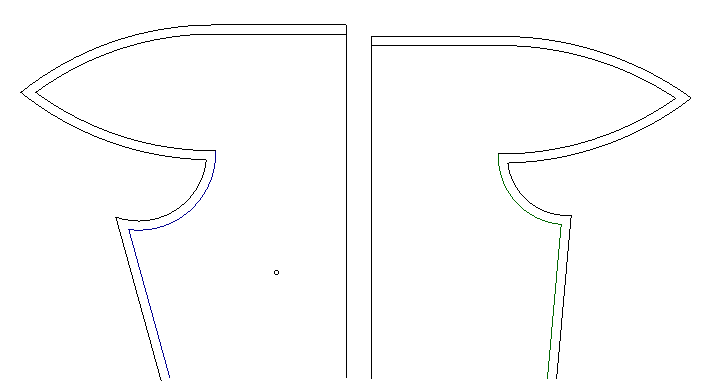
Figure 14. The completed patterns