PatternMaster Knits Cowl - Increasing the Drape - by Helen S
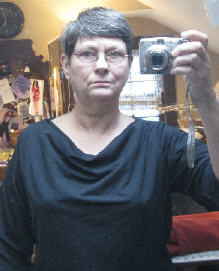
Knit Top with Cowl Neck
The amount of drape drafted in the cowl is based on the size of the bust dart. I knew there was no way the garment would resemble the drawing since I have a modest C cup. So it was necessary to modify it.
Style Editor Options
- Open PatternMaster Boutique or PatternMaster Knits.
- Select the desired garment type - blouse, dress, or sheath.
- Select the Cowl neckline and any other desired style options and settings.
- Save the patterns and open them in the Pattern Editor.
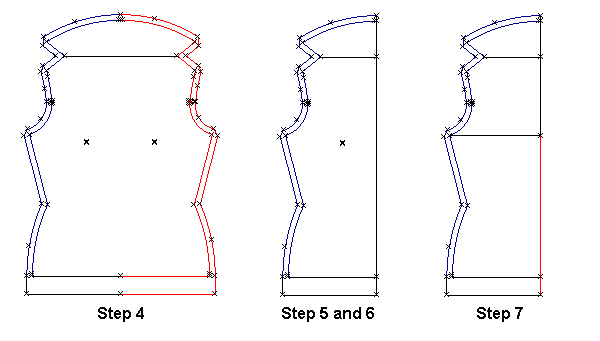
Pattern Editor Steps
The PatternMaster Pattern Editor is used to increase the drape. (I am including the Pattern Editor keyboard two-letter command shortcuts for each step.)
- My default is to bring grouped patterns into the PatternMaster Pattern Editor, so my first step was to copy the front pattern piece (CO) (so that I could always start over) and then save the pattern with a different name.
- Select one of the front patterns and zoom to that piece (ZS). While still selected, ungroup the pattern (GX)
- Select and delete the grain line
- Draw a selection window around the entire right side of the pattern and press Delete.
- Select the line tool (LI) and draw a line from the center front at hem to the top of the facing.
- Since the fold line for the cowl does not already have a center point, we will intersect (IN) that line to the center line just drawn.
- Draw a line (LI) from the underarm point to the center front line. Intersect that line (IN) with the center front line and then break (BR) the center front line on the intersection point.
- Save the file with a new name.
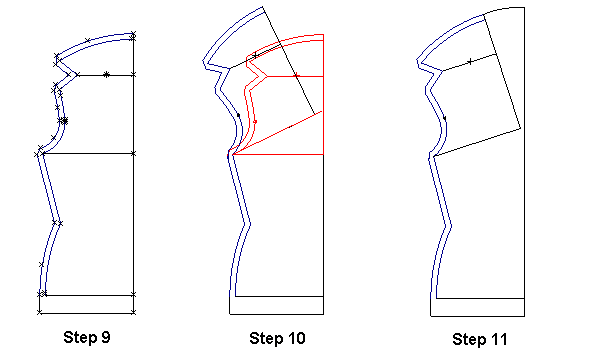
- Now you have to decide how full you want the cowl. I chose to increase the width at the neck by about 6 inches, so as a visual guide I located a point (LP) at 3 inches from the center front at the cowl fold line.
- Select entire upper front with the box selection tool (SC) and then select the rotate object tool (RO). The pivot point is the underarm seam line point and the further away from that point you move your cursor, the better control you will have over rotating the object. I eyeballed the rotation until the intersection of the fold line and the center line was approximately over the 3 inch point on the original fold line. This did not need to be really exact. If I needed to be exact, I would have made a line connecting that 3 inch point to the point at the intersection of the center line and the under arm line. Then measure that angle and use rotate angle instead of rotate object.
- Now connect the center front line and the cowl facing cut line using the intersect tool (IN).
- Group the pattern (GP) and you are ready to print.